
As I wrote before, I’m going to experiment with using 3D printing to create fine jewelry. My first try at 3D printing jewelry is a pretty simple design, a sterling silver purse charm for my wife. If you’re not familiar with bag charms, take a look at this page on Louis Vuitton’s website. They can be quite expensive and are usually made out of non-precious metals. So I thought I’d create a custom charm for my wife, have it 3D printed in plastic, and then cast it in silver. This blog post covers the process up to the first test casting …
The design for the charm is pretty simple — at least I thought it was when I started!
Although the charm is meant to be 3D, I started by designing it in a 2D drawing program (iDraw for the Mac) to get a basic design in place:
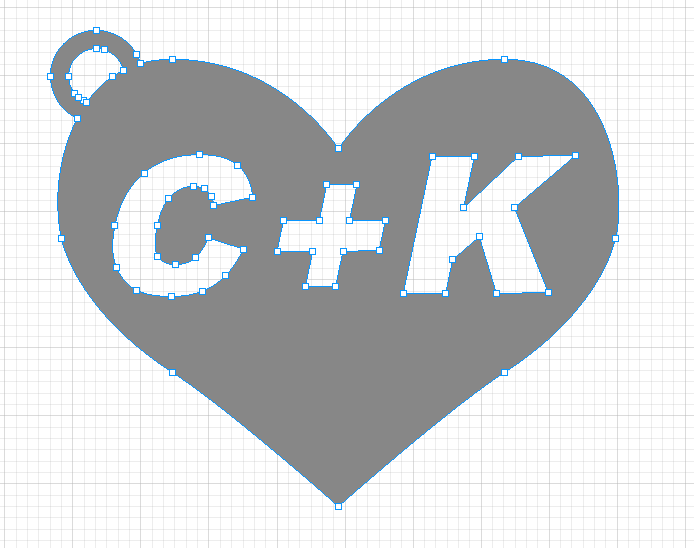
Original 2D design
(I’m Charles and my wife is Kathy, in case you’re puzzling out the letters). The basic approach to drawing this was to create the heart out of bezier curves (which is tricky, but not too tricky), create the C+K text, intersect the two (to cut out the letters from the heart), and then add the ring for the attachment point for a chain (which I did by creating a lower case “o” and then union-ing it with the heart). There were a lot of alternative designs that got tossed away, so it took a while to settle on this design, but the design itself is fairly simple (intentionally so, as I’ll say over and over again!).
The next step is to turn this drawing into a 3D object. I exported the drawing as a Scalable Vector Graphics (SVG) file from iDraw and then imported it into Blender, a free 3D design program:
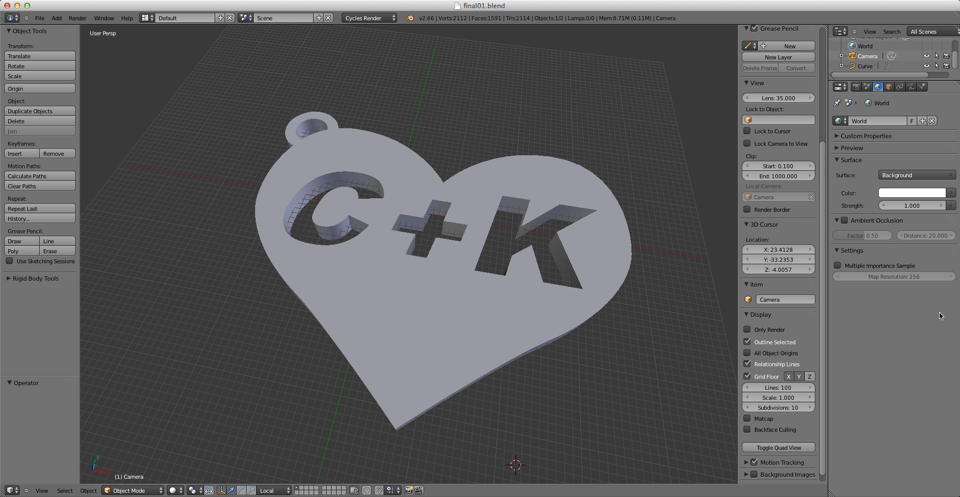
The heart made 3D
In Blender I “extruded” the design — converted it from a flat two-dimensional object into a three-dimensional one with a specific depth. There was some fiddling with the dimensions of the charm (the SVG import doesn’t seem to do anything useful with sizing) to get it where I wanted to be, but that was about all I really had to do in Blender. When I was happy with the 3D version of design, I exported it as a “STL” file (which stands for STereoLithography).
Shapeways accepts the STL file as one of the 3D formats it can print from. So it was straightforward to upload the design to Shapeways and have them print it in plastic:
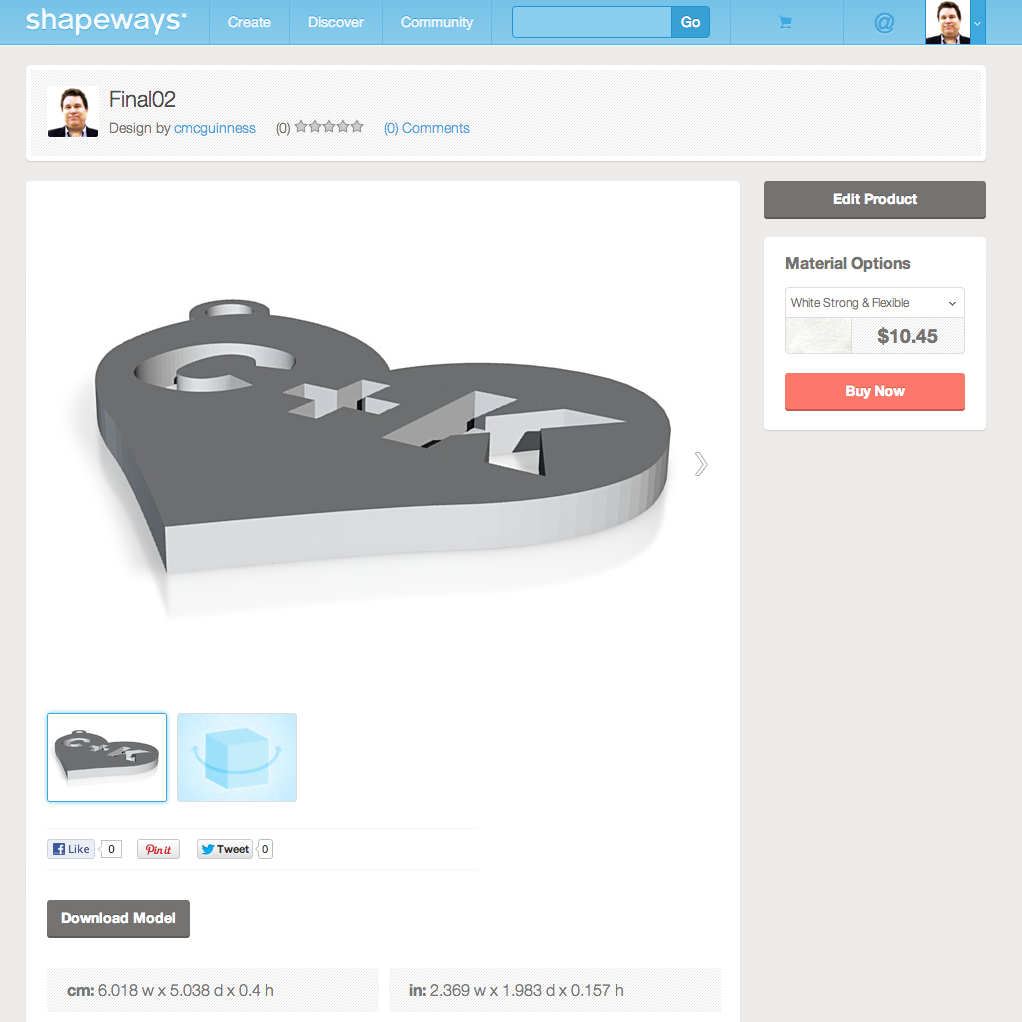
The charm as viewed on Shapeways
About $10 plus shipping. And I waited … Shapeways isn’t the fastest, but they seem like the best choice for this. The turn-around time means that this is a bit of a slow motion process (and it’s why I’m also in the process of building my own 3D printer from a kit).
When the printed version arrived it looked just as I imagined!
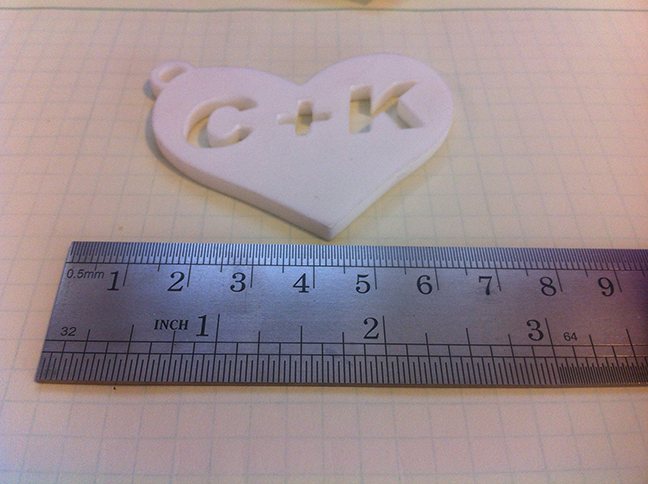
The printed charm!
If only sintered white plastic was just what my wife loved — I’d be done!
But plastic is not what she likes in purse charms. Si the next step, then, is to use the plastic 3d print as the model to cast it into sterling. I use a metal casting system called “Delft Clay“, which is a form of sand casting. Basically, there is a circular mold frame in two halves. You pack the “clay” (which is a very fine sand mixed with oil) around the model (the plastic charm I 3D printed) to form the mold. In “lost wax casting”, which is what most jewelers use, the next step is to put the mold into a kiln and melt the plastic out of it. That destroys the model in the process (hence lost). But in this form of casting, you just pry the mold back open again — very carefully — remove the model, and put the mold back together again. At this point you have a mold that holds the shape of your object — and your model is safe and sound.
After creating the mold from the plastic model I am ready to start the casting and get everything set up. I have about 3.5 troy oz of silver in the crucible (I calculated the the charm itself needs about 2.4 ozt of silver) and everything set up. The bricks are all insulated and will protect everything else from the high heat needed.
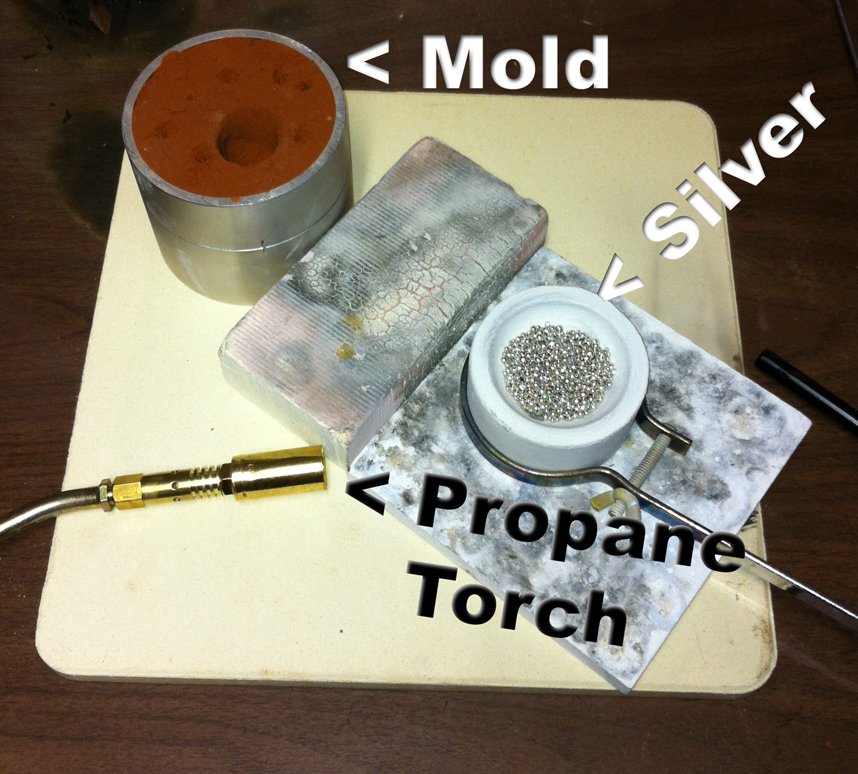
All ready for casting!
The process is very straightforward: I melted the silver … which takes a while since I’m using a small torch and am using a fairly large amount of silver … and then poured the melted silver into the mold …
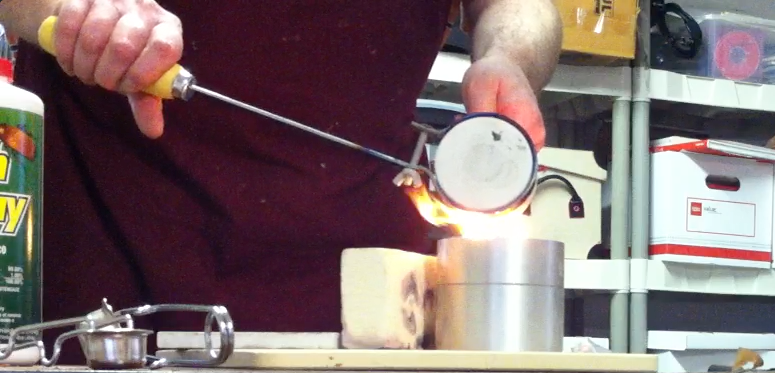
Molten Metal! Fire!
and … I didn’t quite get it all into the funnel quickly enough. Damn! The result was close, though:
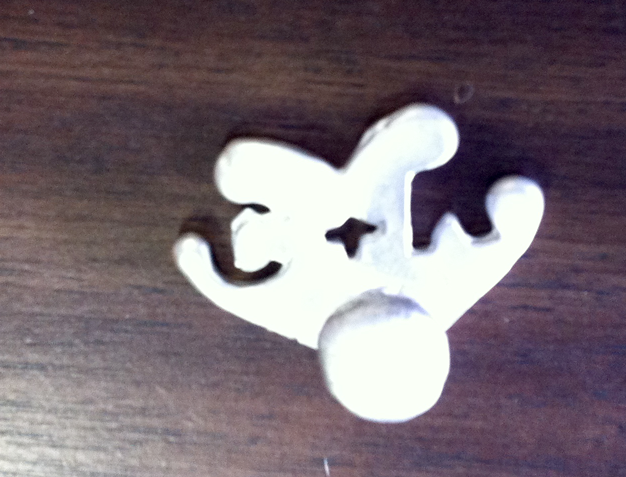
Almost all the way…
A combination of a my wobbling when I poured the silver and making the bottom of the funnel too narrow prevented the liquid metal from making it all the way to the edges of the charm. Other than time lost, though, no harm: one nice thing about the delft clay system: the model is not destroyed in the process. So I can try again, but this time will (a) move the funnel closer to the middle of the charm and (b) make the funnel wider. That, I hope, will get me the complete charm!
You might ask (well, if you are very familiar with Shapeways): why don’t I just have Shapeways print it in sterling for me? There’s several reasons, really. The first is material: I am using a form of Sterling known as Argentium, which is a more modern and tarnish resistant alloy that replaces some of the traditional copper with germanium. This means my wife won’t have to be constantly polishing tarnish off the charm (which would cause it to lose its charm, so to speak). This form of sterling is almost magic and costs only about 10% more than traditional sterling. The second is a sort of DIY ethic: Shapeways doesn’t directly print in sterling: they print in plastic and use the plastic model to cast the silver. I might as well do that step myself. A third reason is that the charm is kind of heavy, and Shapeways charges about 2x what the raw metal cost me (aka “twice melt”). Not that it isn’t worth it in terms of time saved! Finally, even when the charm is casted it’s not really done: I want to polish it beyond what Shapeways will do, and then I have to solder on a chain and lobster claw to finish it completely. This, I think, is a big limitation of 3D printed jewelry so far: the 3D printing process doesn’t get you all the way to a finished work: you have some amount of hand finishing and there may be other hardware you need to attach to the design to complete it.
In my next update, we’ll see how the next round worked out for me…