
Convert the heart into a 3 dimensional mesh
Now that we have the basic shape for the heart, it’s time to convert it into a 3 dimensional object. This process is fairly straightforward, but it is important to do it in this fashion; there are other approaches that end up with an object that looks fine in blender, but is not properly extruded and will cause problems later on when editing or even at print time.
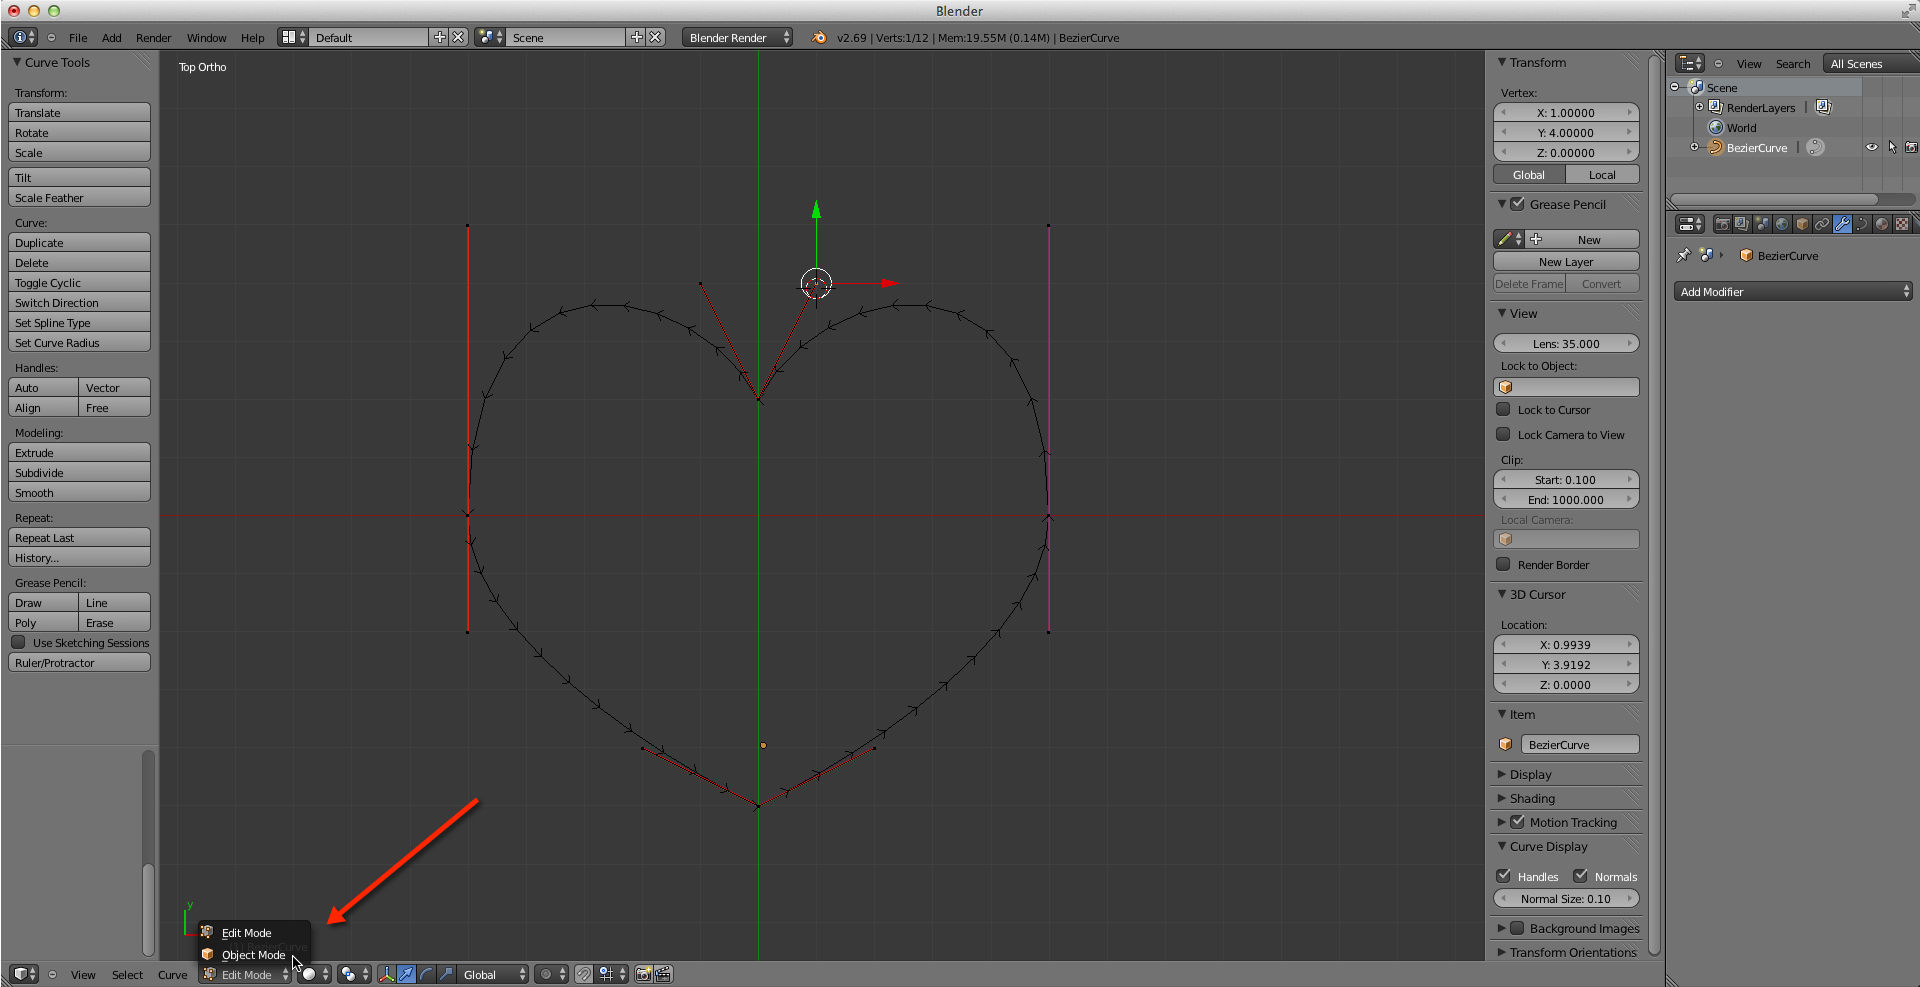
- Switch from Edit Mode to Object Mode by pressing the Tab key, or by selecting the mode at the bottom of the window.
- Next, indicate that the shape is a 2D shape:
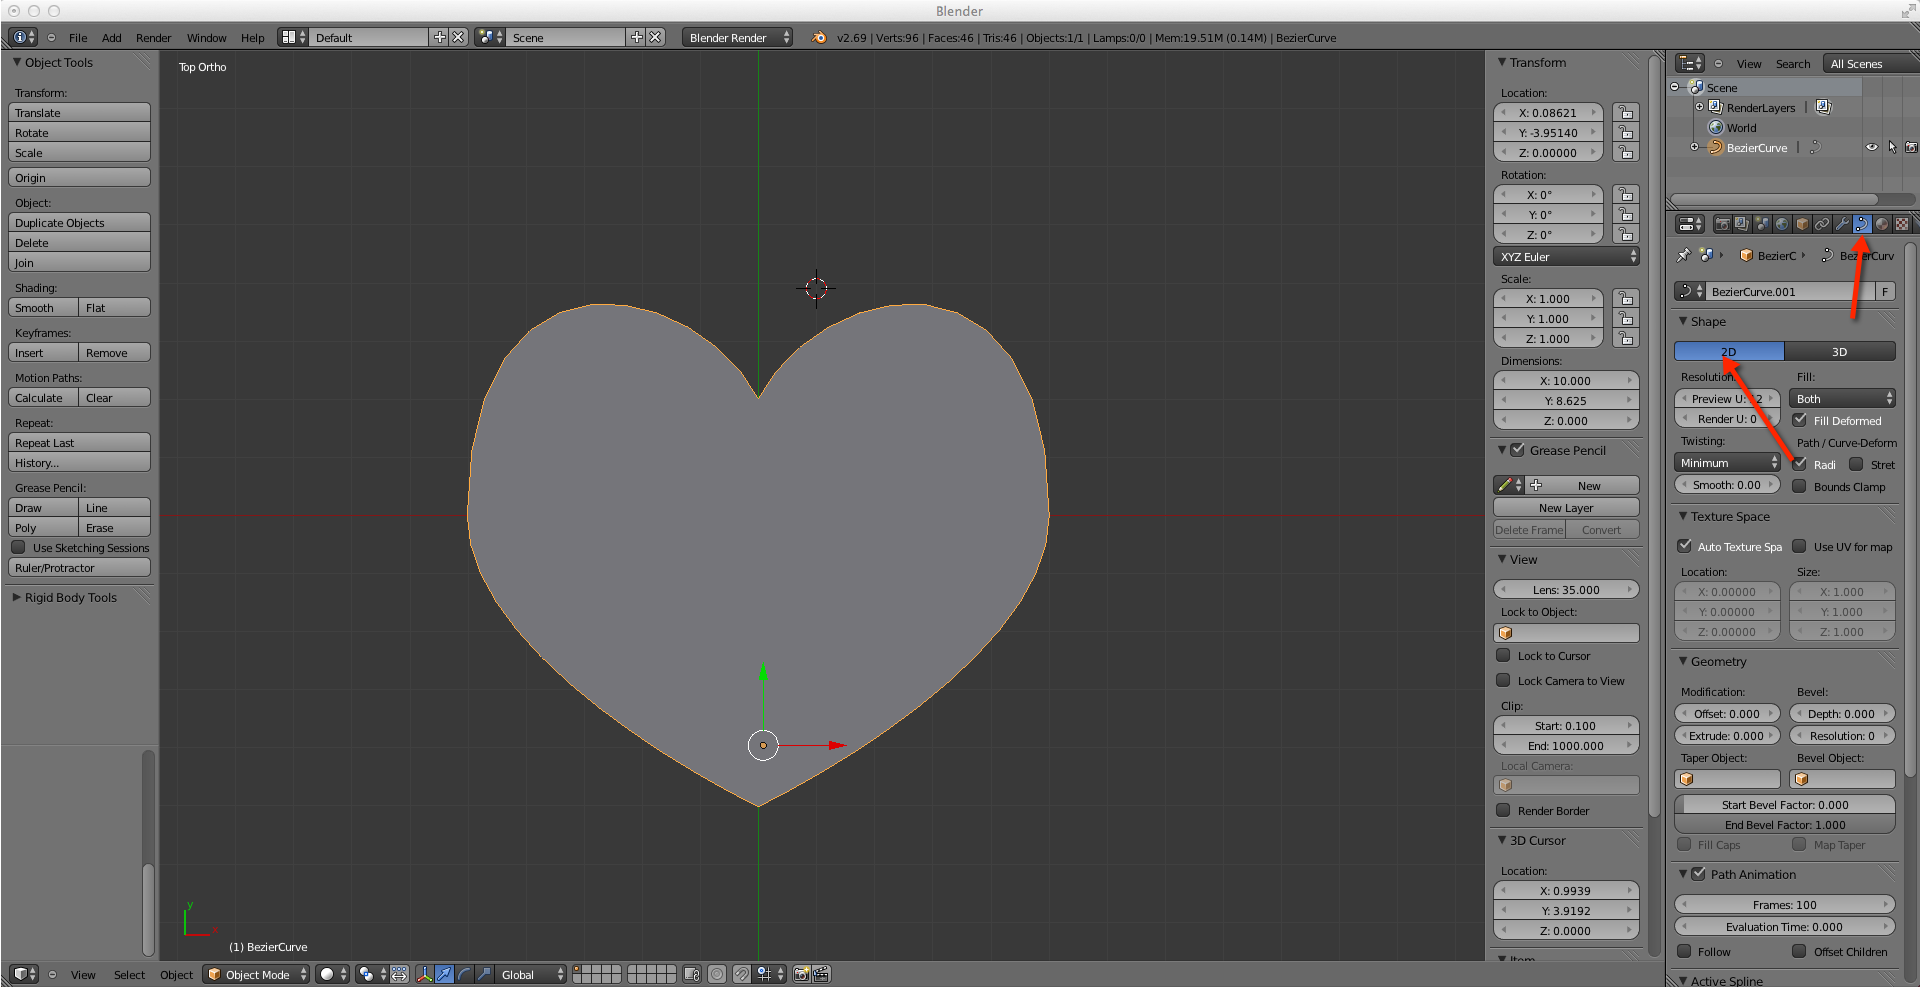
- You should see the heart fill in with grey. Next, we’re going to convert it to a mesh. When we do that, we lose our ability to edit the control points, so this is a great time to save a backup copy of your work.
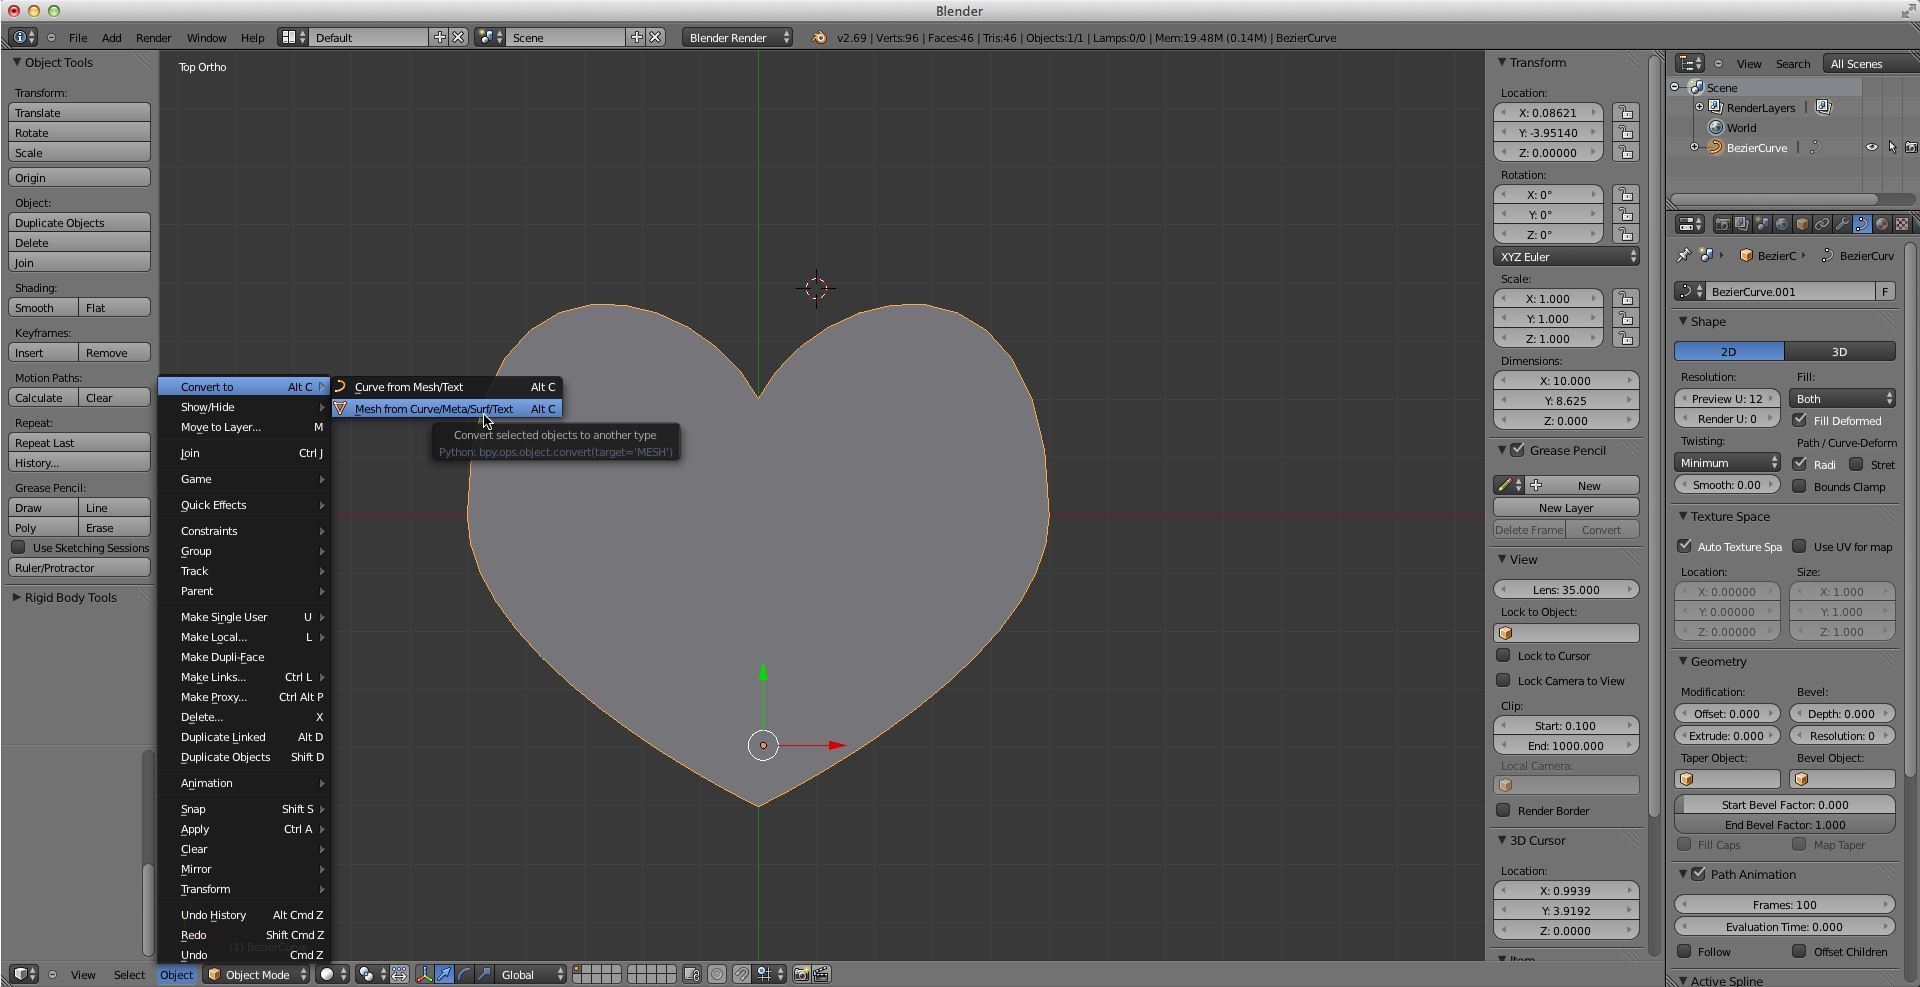
- Select the “Object” Menu, then “Convert To”, then “Mesh from Curve/Meta/Surf/Text”:
A mesh is the building block of 3d objects. Unfortunately, at the moment, ours is still rather 2D, but we’re going to fix that.
- Press the “2” key on the numpad a few times to rotate the heart backwards. Then press the tab key to switch into Edit mode:
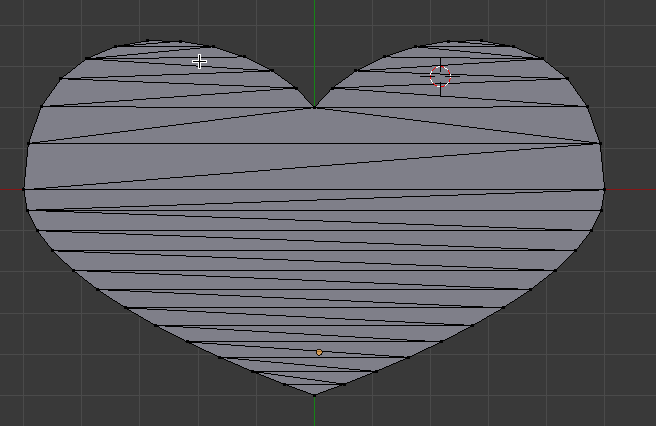
You can see the triangles that make up the surface of the heart.
- Press “a” to select all — you should see the heart become orange as a result.
- Click somewhere in the heart, and then press the “e” key. Drag the mouse up a bit and then left click. You now have a 3D heart:
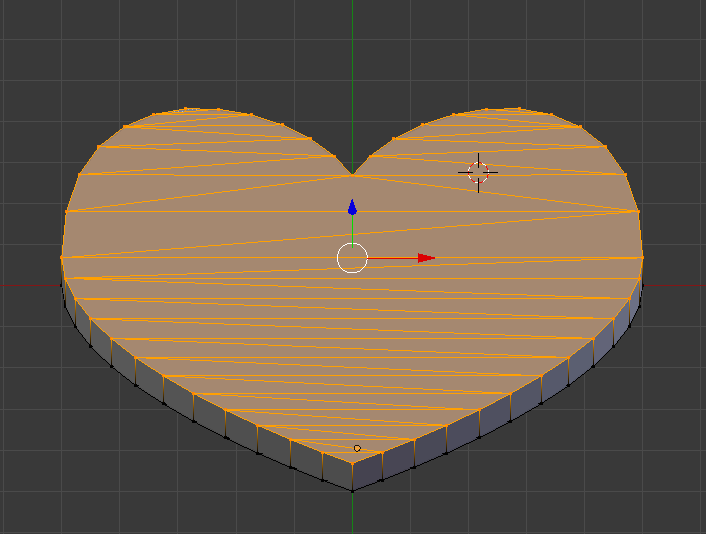
You can see the depth change with your mouse as you drag.
There are other tempting ways to do this (Extrude in properties, for example), but I have found this approach works the best and avoids the kinds of problems I mentioned at the start of the article.
- Press tab to switch back to object mode. Press 7 to go back to a top view. It kind of looks like the heart is 2D again, but it is not.
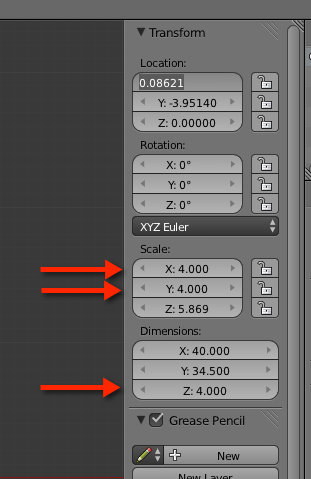
- Our next step is to size the heart appropriately for our print. The dimensions in Blender naturally translate into MM, and right now we have a rather small heart. Since the width right now is 10, and 40 mm is a good with for test purposes, set the Scale X to 4, then the scale Y to 4 (so we keep the proportions the same). We can set the Z dimension directly to whatever width we like — I like 4mm (no relation to the 4 in the scale), so I set that to 4:
- You might have to zoom out a bit to see the whole thing.
- When the heart is shaped properly, I apply the scaling (so that the native size of the heart changes, rather than the scaling factor. I do this by making sure the heart is selected, going to the Object menu, selecting apply, and then scale:
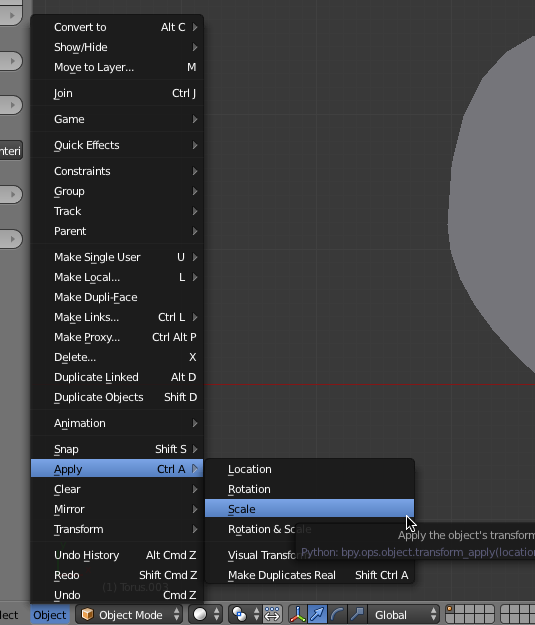
Eagle eyes will note in this screen shot the heart is not selected, but it should have been.
That completes the process of converting the heart to 3d. You could, if you like, just print it now. But we want to add a half ring to the top, first. Regardless, you should save a checkpoint of the file now.