
Add in the ring at the top for attaching to a jump ring
Since I want to attach the heart to something, I need to add a ring to the top of it. In reality, since this is something I intend to cast in sterling, I could simply solder on a ring after it’s cast. But since I want to get the placement of the ring right, I’d rather do it in the editor and cast the heart with the ring.
Here’s how I do it:
- I first click in empty space somewhere above the heart.
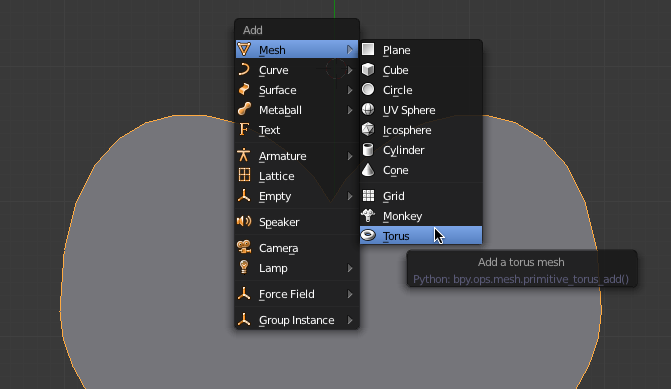
- I then do a shift-a to add, pick mesh, and then torus:
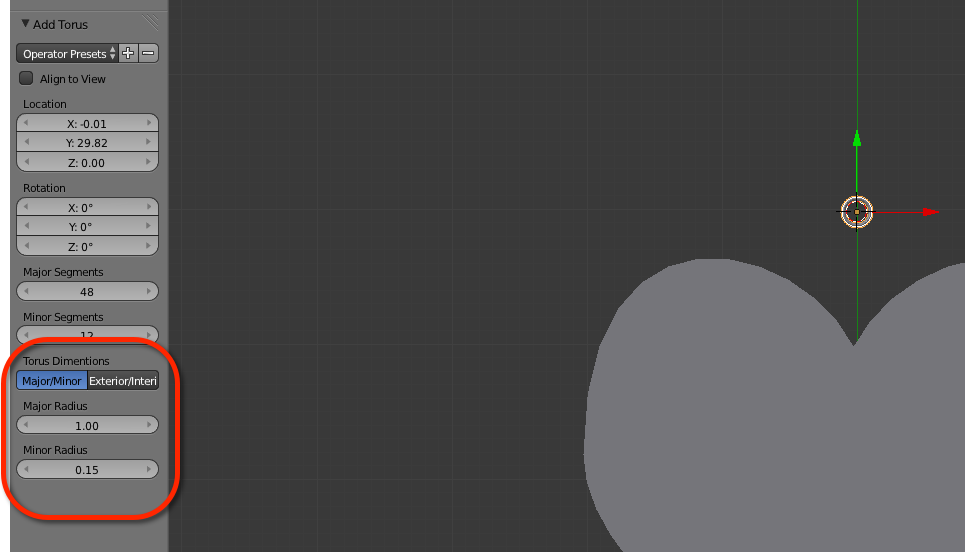
- When you first create the torus, but before you do much to it, you have the ability to make changes to the ratios in the torus. The torus is a ring shaped item, and there are two key dimensions to it. The first is the radius of the ring itself — how big of a hole (more or less) it has. The second is how thick metal will be — the gauge of the wire, in a sense. The first number is the major radius, while the second is the minor.
- I like to set the major to 1 and the minor to 0.15. If the tools panel on the left is not visible, press t to make it show up. Then change the radii accordingly:
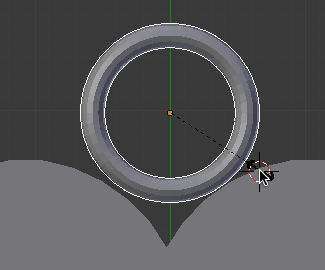
- Next, scale the ring up to some size that is usable. Click near the torus then press s for scale. Drag the right out until it is “big enough”, then left mouse to stop scaling:
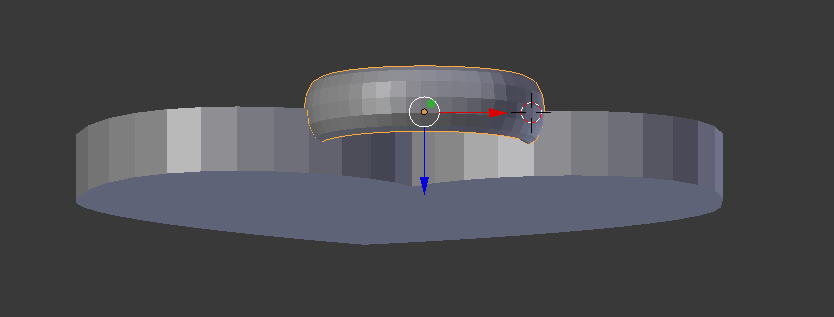
- Next, go over to the Dimensions panel and set the Z to 4 (so it’s the same width as the heart). From the object menu, select apply->scale.
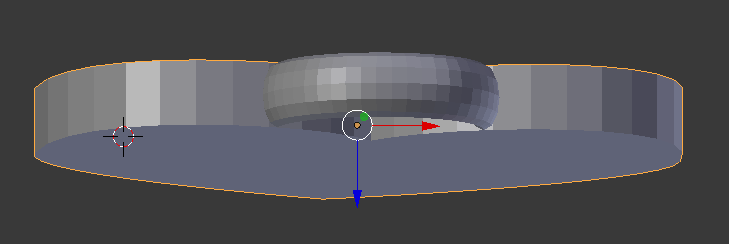
- Drag the green arrow down so that the bottom of the ring disappears into the heart:

- Next, we have to make sure that the two objects are aligned on the Z axis (which, at the moment, they are almost most certainly not). Use the middle mouse button to rotate the view so you can see the top of the heart:
- This is probably not the best way to align everything, but it works for me, so here goes. Select the torus, and then from the Object menu select Transform->Origin to Geometry. This makes sure the “origin” of the torus is in the middle of it (which it probably already is is). Make sure the location (found in top of the Transform bar) has both the X and Z set to zero.
- Then do the same to the heart (and it is almost certainly not in the middle). Setting its X and Z to zero ensures it’s aligned with the torus.
- Everything should be aligned properly:
- Press 7 on the numpad to go back to top view.
- At the moment, we have two, overlapping objects, We need to have one non-overlapping object. Make sure the heart is selected.
- Click the wrench in the properties window, click where it says “Add Modifier”, select boolean:
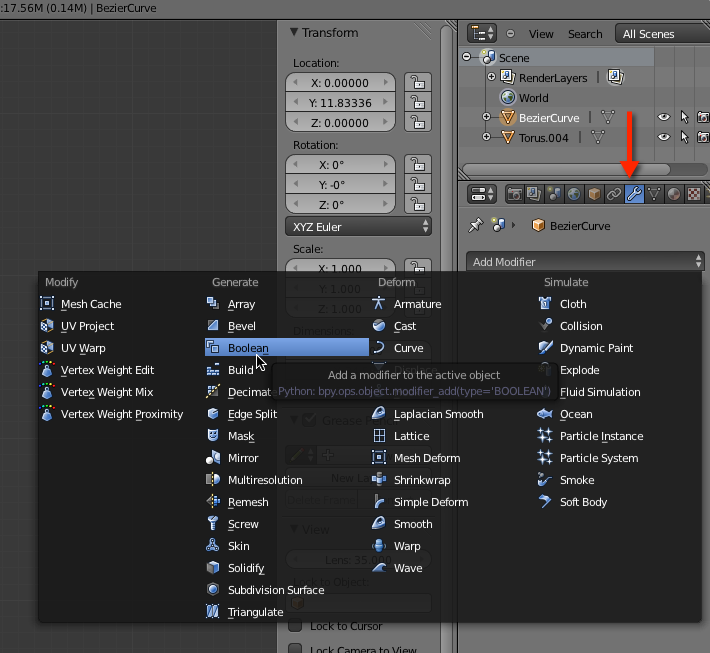
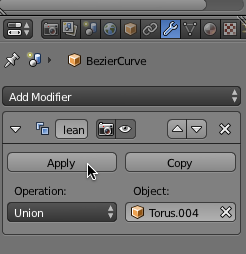
- Select “Union” as the operation and the Torus as the object (your torus name may be different from mine, but it’s the only choice in the list). Press Apply:
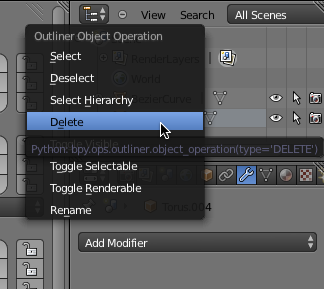
- This will merge the heart with a copy of the torus, but oddly enough leaves the original torus alone (so you have two of them). Delete the remnant torus in the following fashion: First, select the Torus in the tree menu above the properties:

- You can see that the outline of the torus is show. Now right click on the torus in the tree menu and pick delete:
- Save a final copy of your blender file, your heart is created.