
I am working on a project to make earrings, and I wanted to add a heart in the middle of of each earring where it’s connected via a jump ring to the element above and below it. This meant adding a ring at the top and bottom of the heart.
I’m using Blender to model the earrings, and it turned out to be surprisingly hard to get it so the heart would print right. Even though it looked fine in Blender, viewed properly in Slic3r, it still ended up printing wrong from the generated g-code. The ring, even though it was unioned with the heart in Blender would end up looking like it had been intersected, resulting in a gap in the heart, or it would end up filling the interior of the ring, which was not what I wanted either:
After much experimentation, I finally got a reproducible series of steps, and thought I’d document them here… This is going to be everything from scratch to printing, so it’s going to be a bit lengthy. I try to make few assumptions about your Blender expertise, other than a cursory knowledge of how to start it and navigate around it.
Tools in Use
First, here are the tools that I’m using for this:
- Blender 2.69, from http://www.blender.org/
- Slic3r 1.0.0 RC2, from http://slic3r.org
- GCode Viewer, a great web visualization of gcode so I can check to see if the print will work without doing the print, found at http://gcode.ws/
- Final print is done on a Printrbot Jr, v1
Overview of the process
The process is the following:
- Draw the heart using bezier curves in Blender
- Convert the heart into a 3 dimensional mesh
- Add in the ring at the top for attaching to a jump ring
- Export as an STL file
- Convert the STL file into gcode
As a general rule, I should point out that you will want to save your work frequently along the way; this allows you to back up easily if you make a mistake which you cannot rectify later on. And that happens too much, at least to me…
Draw the Heart with Beziers
This isn’t too hard, so long as you’re familiar with how Bezier curves work. Since I know a lot of people aren’t used to them, let me give you a bit of background on them.
How to work with Beziers
Skip to the next section if you’re already comfortable with Bezier curves…
Here’s some information on how they work:
First, and almost useless to us, is the formal Wikipedia description of them. It’s great if you’re looking to implement them in software, but kind of useless if you’re trying to draw with them.
Second is the Blender documentation for them. This is handy to keep on hand, but is not a tutorial. You can also google “blender bezier tutorial” to find lots of videos and texts on how to use them.
All that being said, let me give you a 30 second description of them.
Take out a piece of paper, and draw a square. If you’re normal, you started at one corner, drew a line to the next corner, then to the third corner, then to the fourth corner, and finally back to the first corner.
There’s a couple of things that define your drawing of the square. The four corners, certainly. But if you didn’t draw the last line, closing the square, you would have still drawn the four corners. So then there’s the lines between the corners as well. There’s some interesting things about the lines — they’re straight (let’s pretend they’re perfectly straight for the moment), and then come in and out of the corners at right angles.
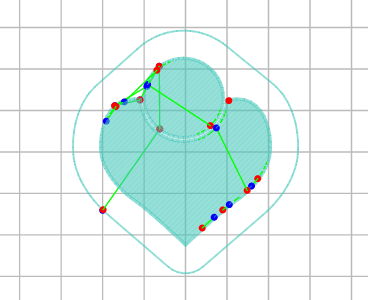
That pretty much defines your square, and, as it turns out, that pretty much defines a Bezier curve as well. Here, as an example, is a square drawn in Blender with a Bezier curve:
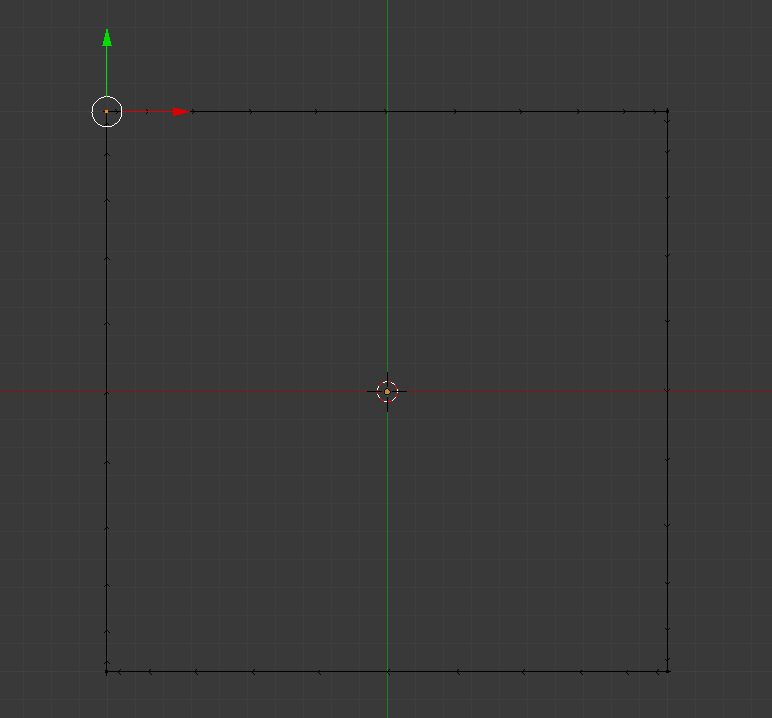
If you look carefully, you can see the lines have little arrows on them showing you how the square is being drawn. At each corner of the square is a “control point”, so called because that’s where the overall direction of the curve changes; the control point describes how the curve comes into the point and leaves. In this case, the curve makes a sharp turn directly for the next control point; that’s what makes the square square.
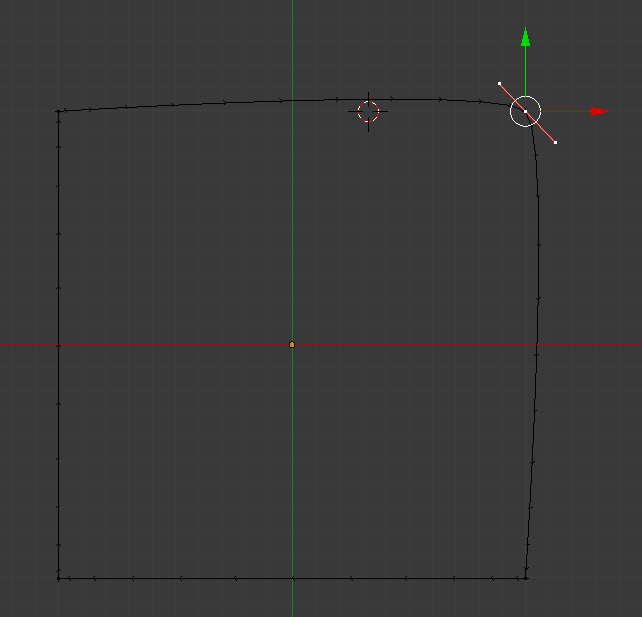
You can control how sharply the lines into and out of a control point make there turn via “handles”. Each control point (except one that is at the end of a line) has two handles (for the line in and line out). And you can drag the control points around to affect the relative roundness of the corner:
While there is a precise definition of how these handles work, I find that if you just drag them around a bit it become fairly obvious how they behave. A line between two control points is affected by the handle controlling how it leaves the first control point and the handle controlling how it comes into the second.
I’ll walk through the steps of creating the heart and you will see how the control points, handles, and overall Bezier curve can be manipulated to make the heart just right.